

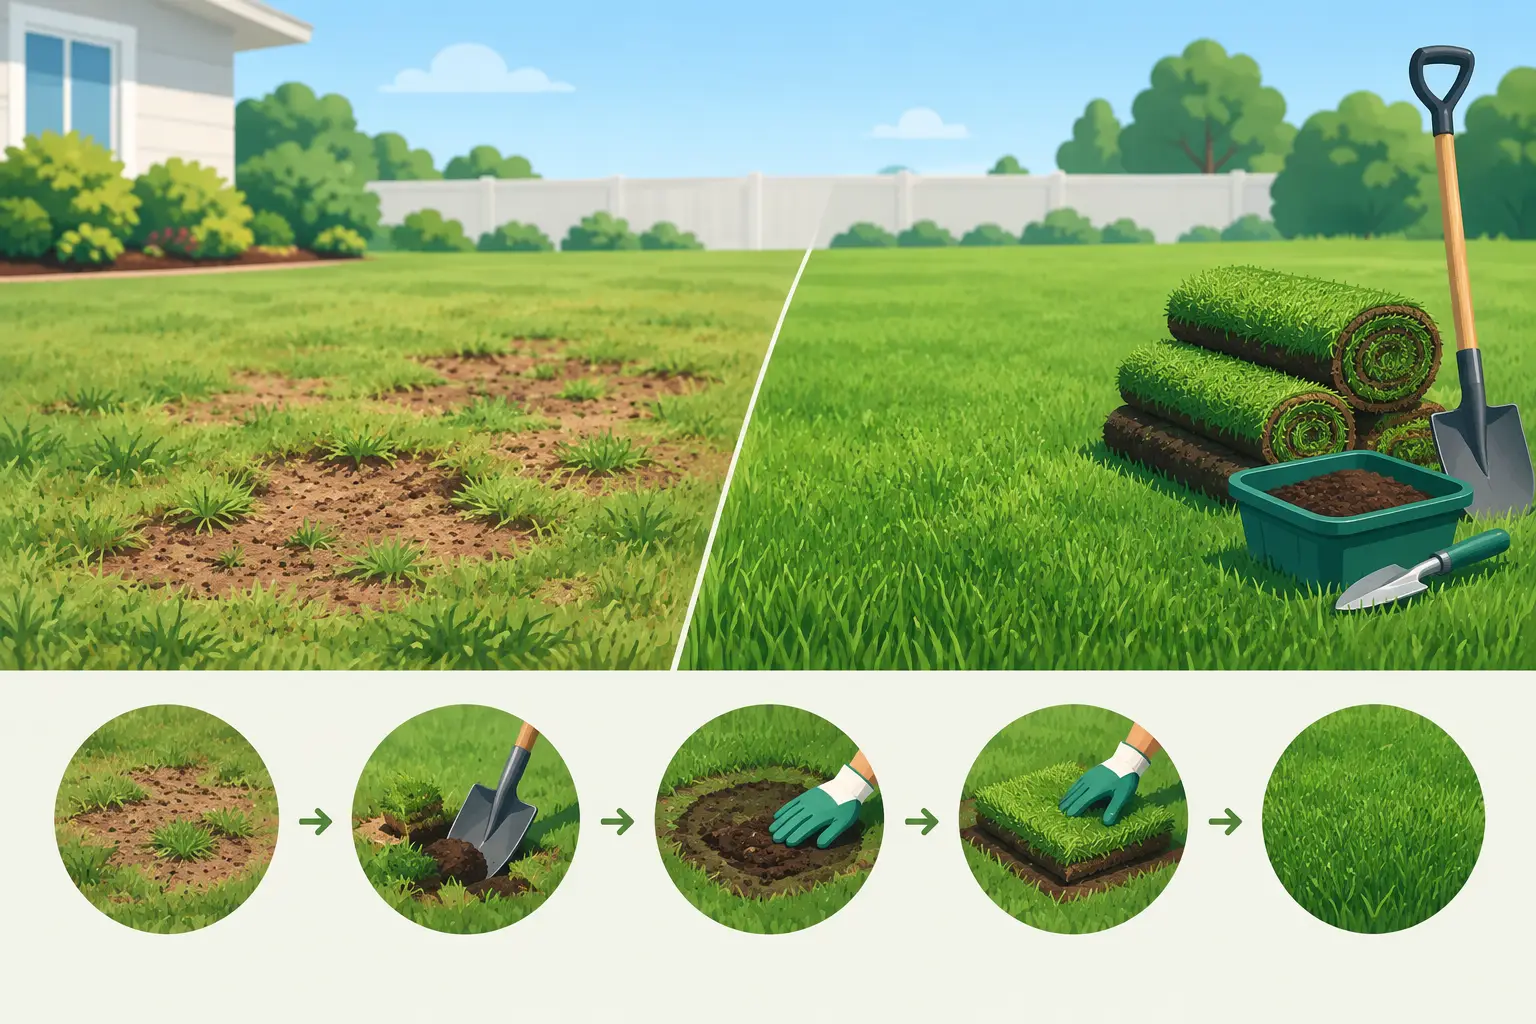
A few thin spots can make an otherwise well-kept property look neglected fast. The good news is that learning how to repair patchy sod is usually less about a complicated fix and more about identifying why the turf failed in the first place. Replace sod without correcting the underlying issue, and the same bare areas may return next season.
For homeowners and property managers, the best repair plan starts with a close look at the damaged area. Is the sod dry and lifting at the edges? Is the soil packed hard? Are weeds taking over, or is the spot shaded by a tree, building, or parked vehicle? Those details determine whether a patch needs better watering, soil preparation, new sod, or a larger lawn-care adjustment.
Find Out Why the Sod Is Patchy
Patchy sod is a symptom, not a diagnosis. In Kentucky lawns, heat stress, foot traffic, poor soil contact, insects, disease, and irrigation problems can all leave turf thin or dead. Newly installed sod is especially vulnerable during its first several weeks because the roots have not yet grown into the native soil.
Start by gently lifting a corner of the affected sod. Healthy, established turf should resist lifting because its roots are anchored in the ground. If it peels up easily, the sod may not have rooted properly. That often points to inconsistent watering, poor soil preparation, or a gap between the sod and soil below it.
Look for patterns, too. Damage along sidewalks, driveways, and sunny slopes often comes from heat and dry conditions. A round brown patch that expands may indicate disease. Turf that pulls up like loose carpet and reveals white grubs in the soil may have insect damage. If only one sprinkler zone is struggling, irrigation coverage deserves immediate attention.
Before installing new pieces, correct the cause. A fresh patch of sod cannot thrive where water never reaches, drainage stays poor, or compacted ground prevents roots from growing.
How to Repair Patchy Sod Step by Step
The right repair method depends on the size and condition of the damaged area. Small patches can often be repaired with sod pieces cut to fit. Larger areas may be more economical to reseed in the right season, although sod gives a more immediate finished appearance and is often the better choice for visible front lawns, slopes, or commercial entrances.
1. Remove dead turf and weeds
Use a sharp spade or sod cutter to remove dead grass, weeds, and loose sod from the damaged area. Cut back to healthy turf where possible, making straight or gently curved edges that are easier to patch cleanly. Removing weak grass matters because it can harbor weeds, disease, or insect problems that affect the new sod.
Do not lay sod over old dead turf. The new roots need direct contact with prepared soil, not a layer of decaying grass underneath.
2. Loosen and level the soil
Break up the top 2 to 4 inches of soil with a hand cultivator, garden rake, or shovel. If the ground is heavily compacted from traffic or equipment, loosen it more deeply before bringing the surface back to grade. Remove rocks, roots, and construction debris that could interfere with rooting.
Add a modest amount of quality topsoil or compost only if the existing soil is thin, poorly graded, or missing organic matter. More is not always better. A thick layer of loose material can create a soft, uneven patch that settles below the surrounding lawn later.
Rake the area level, keeping the finished soil surface about 1 inch below the surrounding turf. Once the sod is installed, it should sit flush with the existing lawn rather than creating a raised edge that catches mower blades.
3. Check drainage and irrigation coverage
Water should soak into the repaired area without pooling for hours. If water collects in the same low spot after rain or irrigation, address the grade or drainage before putting down new sod. Constantly wet roots can be just as damaging as dry roots.
Run the irrigation zone or use a sprinkler to see whether water reaches every part of the patch. Nearby shrubs, trees, fences, and the arc of sprinkler heads can create dry pockets that are easy to miss. Adjusting a head or adding coverage may be the real repair your lawn needs.
4. Install matching sod tightly
Choose sod that matches the existing grass type as closely as possible. Many lawns in the Louisville area use cool-season turf such as tall fescue, and matching the texture and color will help the repaired area blend in over time.
Lay sod pieces tightly together in a staggered pattern, much like brickwork. Do not overlap the edges, but do not leave gaps either. Gaps dry out quickly and invite weeds. Trim pieces to fit with a sharp utility knife or spade, then press the sod firmly onto the prepared soil.
A lawn roller can help improve sod-to-soil contact, but it should be used lightly. The goal is contact, not compaction. If you do not have a roller, walking carefully across the patch or pressing it with the back of a rake can work for small repairs.
Water New Sod the Right Way
Water is the difference between a patch that blends in and one that shrinks, browns, and fails. Immediately after installation, water the repaired sod thoroughly until the soil beneath it is moist. Lift one corner after watering to make sure moisture has reached the soil, not just the grass blades.
For the first 7 to 10 days, keep the sod consistently moist. During hot, dry weather, that may mean watering lightly more than once a day. In cooler or rainy conditions, less frequent watering may be enough. The goal is moist soil, not standing water.
After the initial rooting period, begin watering less often but more deeply. This encourages roots to grow downward rather than staying near the surface. By the third or fourth week, the sod should be showing resistance when gently lifted and can usually transition toward a normal watering routine.
Avoid relying on a strict calendar alone. Temperature, rainfall, soil type, shade, and wind all change how quickly sod dries out. Check the patch regularly, especially along its edges.
Protect the Repair While It Roots
New sod needs a little patience. Keep foot traffic, pets, lawn equipment, and parked vehicles off the repaired area until roots are established. If the patch is near a common path, consider temporarily redirecting traffic. Repeated pressure can loosen seams and compact the freshly prepared soil.
Wait to mow until the sod has rooted and reached a mowing height above the surrounding lawn. Make sure mower blades are sharp, and avoid removing more than one-third of the grass blade at a time. For most cool-season lawns, mowing around 3 to 4 inches supports deeper roots and helps the turf handle Kentucky summer stress.
Hold off on heavy fertilizer applications immediately after installation unless a soil test or sod professional recommends one. Excess fertilizer can stress young roots, particularly in hot weather. Once the lawn is established, an appropriate seasonal lawn-care plan can help the repaired area keep pace with the rest of the turf.
When Patching Is Not Enough
A few isolated areas are good candidates for spot repair. However, if more than one-third of the lawn is thin, weed-filled, uneven, or repeatedly failing, a larger renovation may provide a better long-term result. Repeated patching can create a lawn with several grass textures, uneven grades, and ongoing maintenance headaches.
Shade is another situation where expectations should be realistic. Sod can improve a thin area, but grass still needs enough light to grow. In deeply shaded spaces, selective pruning, drainage improvements, or a shade-tolerant landscape bed may be a more dependable option than replacing sod year after year.
Professional help is also worthwhile when the cause is unclear. A lawn care team can evaluate soil conditions, grading, sprinkler performance, disease concerns, and the best sod choice for the site. MowAction Lawn Care Services can help property owners address both the visible patch and the maintenance issue behind it, from sod installation to irrigation and ongoing lawn care.
A repaired lawn should not look like a repair for long. Give the new sod good soil contact, consistent moisture, and protection during its first few weeks, and it has every chance to grow into the rest of the yard. The payoff is more than green grass - it is a property that looks cared for every time you pull into the driveway or welcome someone to the door.